BMW E36 Oil Change
BMW E36 Oil Change
The following information shows the steps that I follow to change the oil on my 2.8L Z3. Please note that the steps will vary slightly depending on the car that you have.
Before starting, you will need to assemble some tools and supplies:
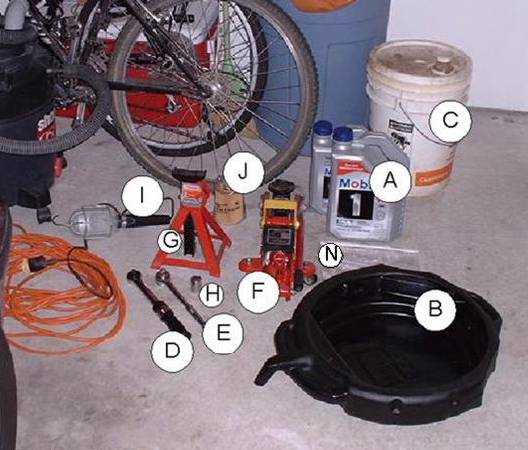
A) 6.5 litres of synthetic motor oil (oil quantity will vary by car model and engine)
B) Oil drain pan
C) Container to store old oil
D) Torque wrench (smaller size which has 25 Nm setting)
E) Ratchet wrench
F) Jack
G) Jack stand
H) 17mm socket (for drain plug) + 36mm socket (for oil filter housing)
I) Trouble light
J) Replacement oil filter cartridge (includes replacement o-ring and oil plug washer)
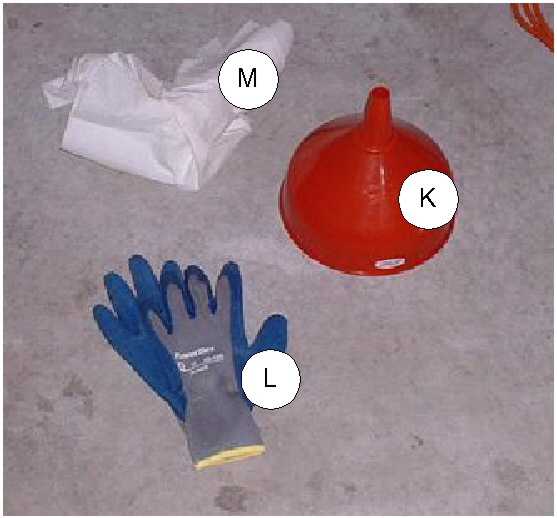
K) Funnel
L) Gloves (optional)
M) Rags or paper towels
N) Freezer size zip-lock plastic bag
Time Check: 0 hrs, 0 min <-- This is a time check of how long the job was taking
Step 1. Before changing your oil, you will have to warm up the engine. Cold engine oil just doesn't flow well enough and you want to get all of the oil out of the engine.
Step 2. Stop the car on a flat surface. If you park on a slope, it's possible that some of the old oil will remain in the pan because drain hole may be on a high spot.
Step 3. Open the hood of your car before continuing.
Step 4. With my Z3, the car is too low to the ground for me to slide underneath so I need to jack it up before doing anything. Other BMW models may not have this problem and you may be able to easily slide under the car to open the oil plug without jacking it up.
Make sure that you place your jack under an appropriate jack point for your car. This is a reinforced part of the body that can withstand the forces or a jack without bending. Placing a jack in the wrong spot will likely end up bending (or breaking) something in your car.
On my Z3, the front jack point is just slightly in front of the front edge of the door. There is a plastic pad under the edge of the body where the jack is supposed to go.
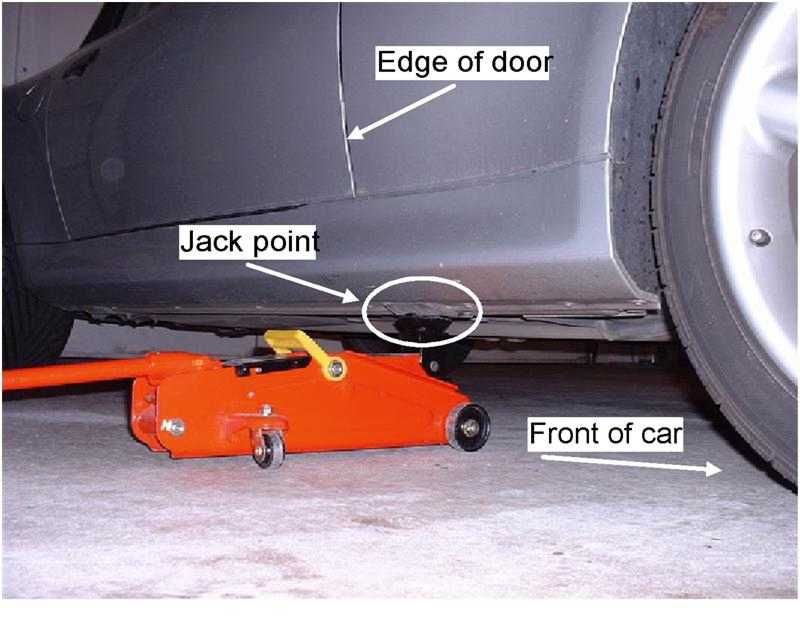
Step 5. I only need to jack up my car just high enough to put a jack stand underneath. ALWAYS use a jack stand before going underneath your car. Relying on just a jack to hold up your car can be a very dangerous situation.
The placement of a jack stand is as equally important as where to place a jack. Putting the full weight of the car on a jack stand on the wrong spot could damage suspension or body parts.
I usually place the jack stand along the crossmember which runs side to side underneath the engine.
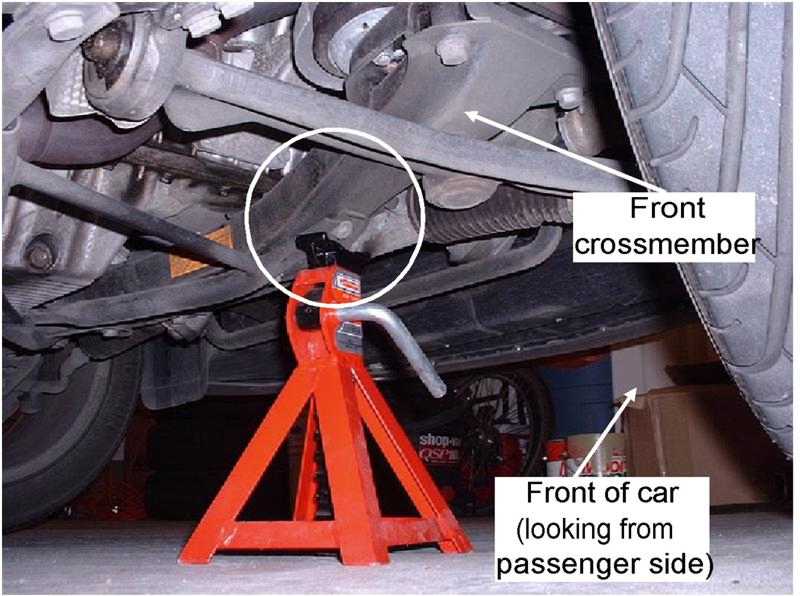
Step 6. Once you get under your car, you need to find the oil plug. On my car, the oil plug faces the passenger side so I get under from that side.
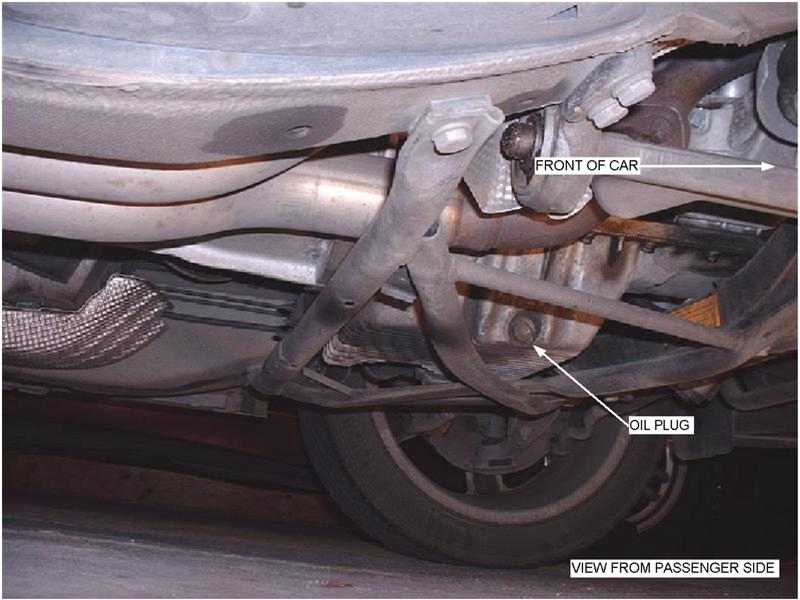
Step 7. Slide the oil drain pan underneath the car. Make sure that the pan will cover the flow of the oil when the oil plug is removed. The force of the oil flow will likely cause it flow out on an angle and not straight down.
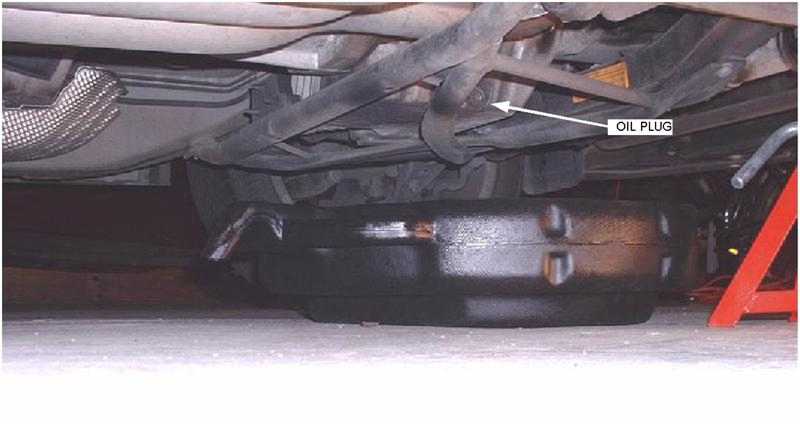
Step 8. On my car, the oil drain plug is 17mm. I find using a ratchet wrench works but a 17mm box wrench would also work well. The first thing that I want to do is loosen the oil drain plug with the ratchet.
Step 9. Once it is loosened, I will unscrew the plug by hand the rest of the way. At the same time that I am loosening the plug, I am pushing the plug back towards the pan. This usually prevents the oil from dripping down (onto your hand) until you are ready to finally pull the plug away and the oil starts draining. If you do this right, you should not get any oil on your hands.
CAUTION: The oil pan plug as well as the oil can be very hot and can burn your hand. Consider using a glove to protect yourself if this is the first time you are doing this procedure.
Step 10. It is quite possible that when you pull the plug away from the hole that you may drop it or the metal washer into the old oil in drain pan. If this happens, don't worry about it and wait until the draining is finished (and the oil a bit cooler) to fish it out of the drain pan.
Let the oil continue to drain as long as there is a steady stream of oil coming out of the hole. I have found that I let this take about 20-30 minutes for the oil to fully drain out.
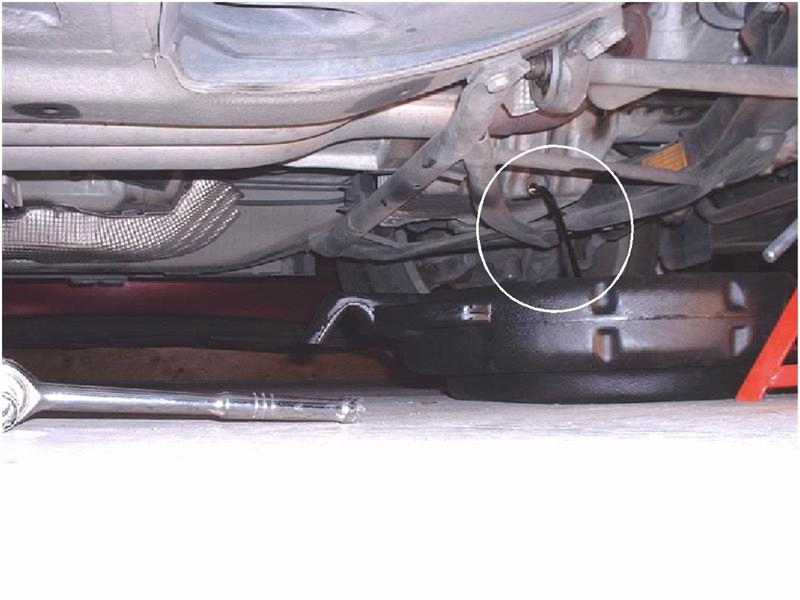
You will have to remove the jack stand while the oil is draining otherwise all of the oil may not drain out of the oil pan.
Step 11. While the oil is draining, remove the oil filler cap. This will allow air into the oil reservoir and let it flow freer.
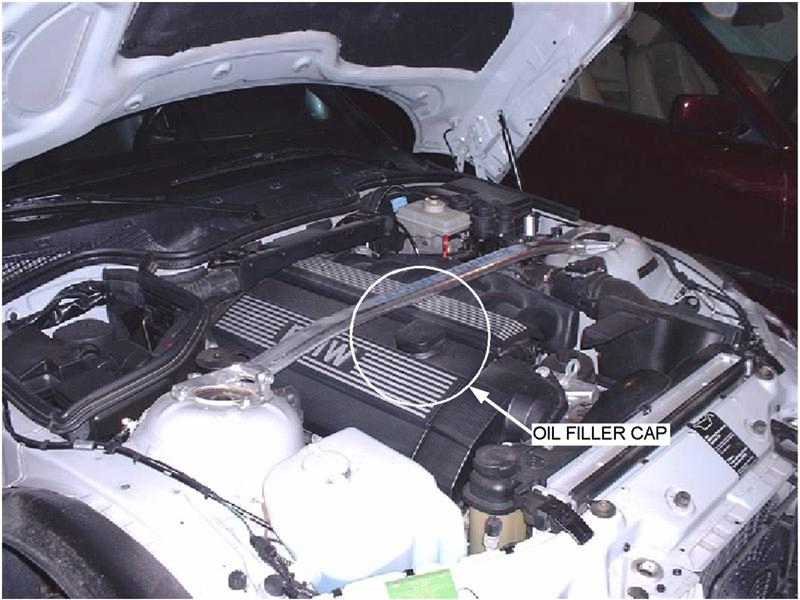
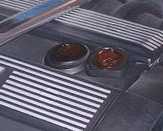
Time Check: 0 hrs, 15 min
Step 12. Now would be a good time to open up the new oil filter package. Inside the bag with the filter cartridge is a new metal washer for the drain plug and a rubber o-ring for the filter housing.
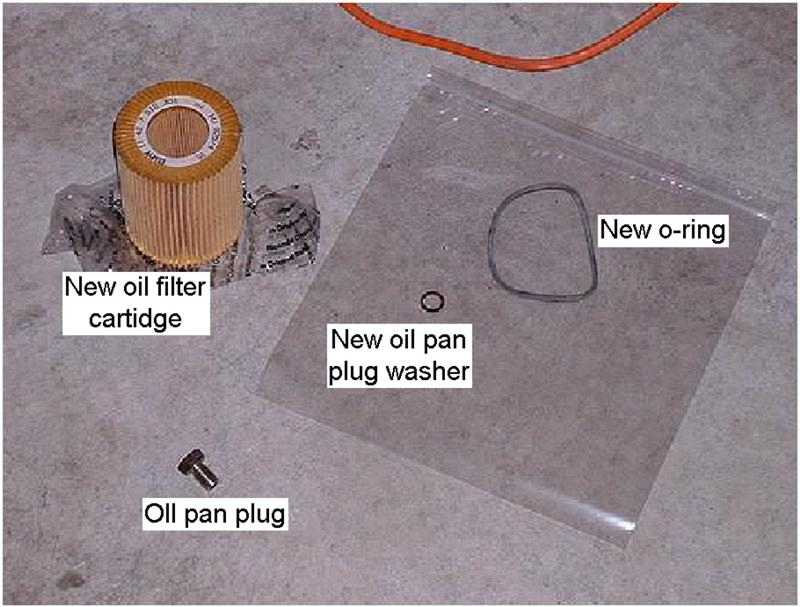
Step 13. Clean off the drain plug and put the new washer on it.
If necessary, jack up the car again and replace the jack stand before proceeding
Step 14. When the oil slows to a drip (or stops altogether), put the oil plug back in the drain hole and tighten by hand as far as it will go. Wipe down the area around the oil drain hole with a cloth.
Step 15. Put the 17mm socket on the torque wrench and set it to 25 Nm. Tighten the drain plug.
If you do not have a torque wrench, you will have to tighten the plug by "feel". Needless to say, over tightening the oil drain plug to the point of stripping the threads will be a fairly major problem that you will want to do everything to avoid.
Step 16. Move the drain pan out from under the car.
Step 17. Remove the jack and jack stands and return the car back to its normal position.
Time Check: 0 hrs, 50 min
Step 18. I usually empty the old oil out of the drain pan into the larger bucket. I will prop up the drain pan against the wall and let it empty overnight. The next morning I wrap the drain pan in a green garbage bag and put it aside until the next time I need it. About once a year I take the larger bucket to the oil recycling place (Mohawk) and empty it out.
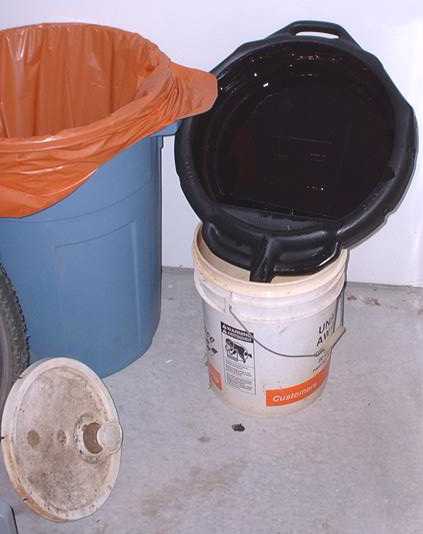
Step 19. Using the 36mm socket, unscrew the oil filter housing. On my Z3, this housing is plastic so I am very careful about not forcing the ratchet on either loosening or tightening.
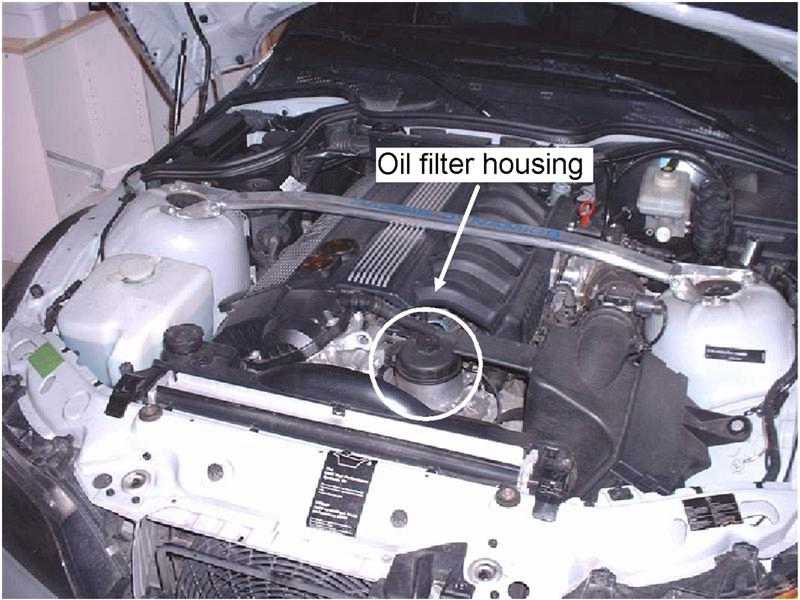
Step 20. Remove the housing and the filter insert. Place a cloth under the filter as you remove it to prevent any oil from dripping on the engine. Place it on a piece of paper.
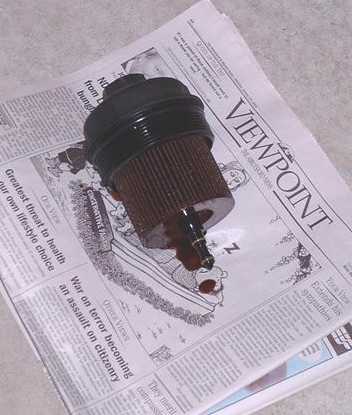
Step 21. Take the zip-lock bag and turn it inside out and place it over your hand.
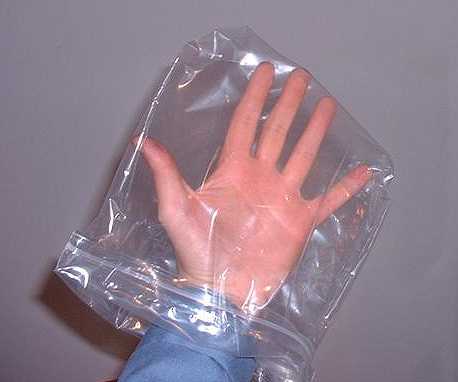
Step 22. Using the inside of the zip-lock bag on your hand, grasp the oily old filter cartridge and pull it off the plastic filter housing.
Step 23. Pull the bottom of the zip-lock bag over top of the cartridge and remove your hand. The dirty filter will now be inside the zip-lock bag ready for disposal without any mess.
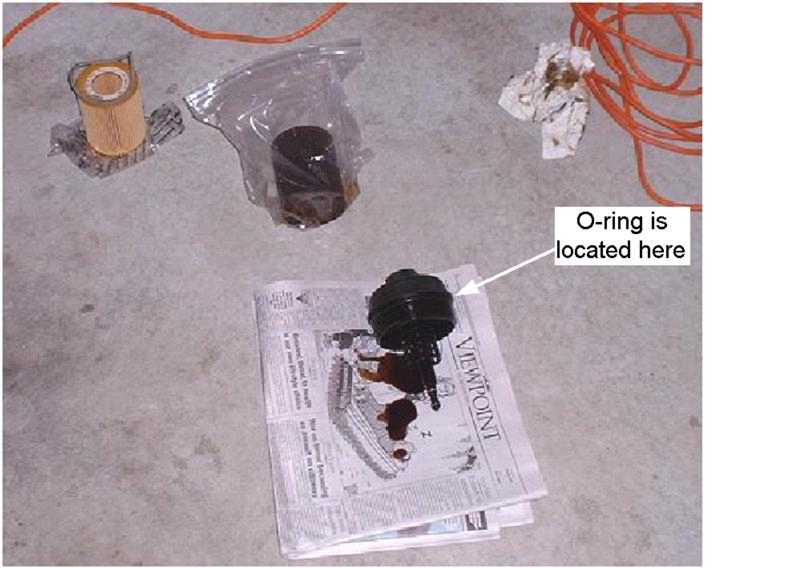
Step 24. Remove the old O-ring on the filter housing and discard.
Step 25. Take the new O-ring and coat it completely in new oil. Install it into the same groove where the old O-ring was.
Step 26. Put the new filter cartridge onto the housing slot. It should now look like this:
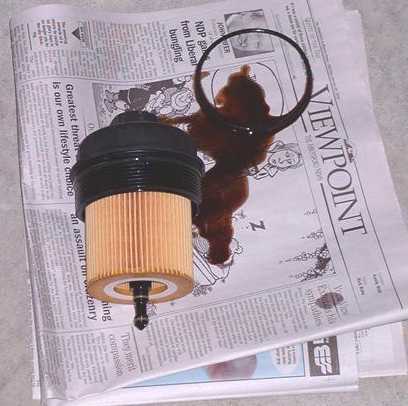
Step 27. Carry the new housing assembly back to the car and carefully thread it onto the original location. In some cases the housing may need to be pushed slightly to get the threading to start.
Step 28. Tighten the housing by hand as far as possible.
Step 29. Using the torque wrench, tighten the housing using the 36mm socket to 25Nm.
Step 30. Wipe off any excess oil around the filter housing.
Step 31. Using the funnel, add the new oil into the oil filler opening. For my car I use 6.5 litres of oil.
Depending on the type of funnel you use, you may want to hold the funnel with one hand and pour with the other. The may prevent the funnel from tipping over and spilling a bunch of oil all over your engine.

Step 32. Once all of the new oil has been poured into the oil spout, remove the funnel and replace the filler cap.
Step 33. Remove any tools from the engine compartment.
Step 34. Start the car and let it run for a few minutes.
Step 35. While the car is running, check underneath near the oil drain plug and on the ground for any leaks.
Step 36. Shut the ignition off.
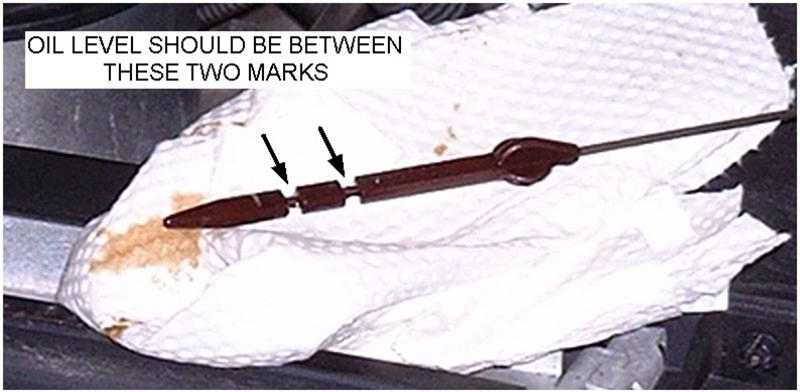
Step 37. Check the oil level. The oil level should be between the two notches on the dipstick.
Time Check: 1 hrs, 20 min
Step 38. Clean up all of your tools.
Final comments: Unlike the "Mr. Lube" type of places, I am in no hurry to get the job done and take my time. Consider that the oil will only flow out of the drain hole at a limited speed so if someone is doing a complete oil change on your car in 15-20 minutes, then is all of the old oil being removed?
About The Author
Baden Smith (March 2004)
smithnet.ca
